openstf是用于管理和控制Android设备的平台,github地址是https://github.com/openstf/stf。不过ios的需要用上其他的,之后再来更新ios相关。
本文介绍: 1) 本地环境搭建 2) 连接远程机器 3)nginx配置 4)问题解决
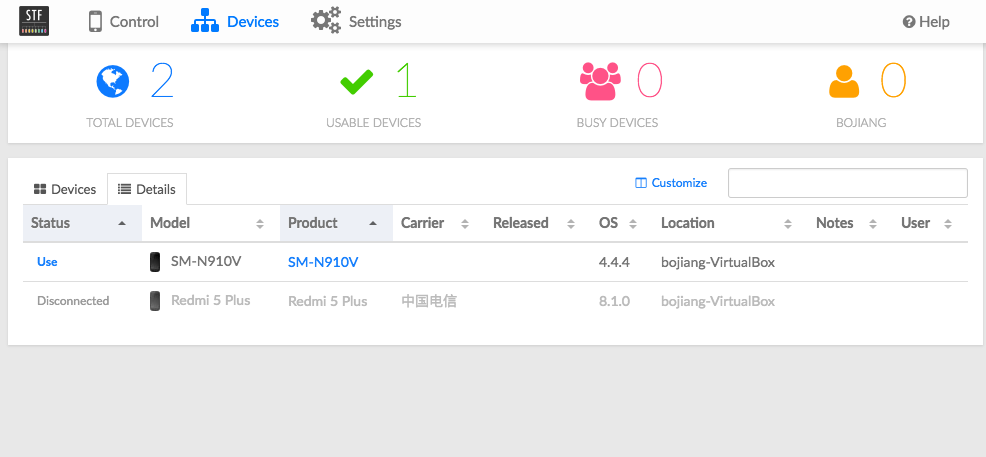
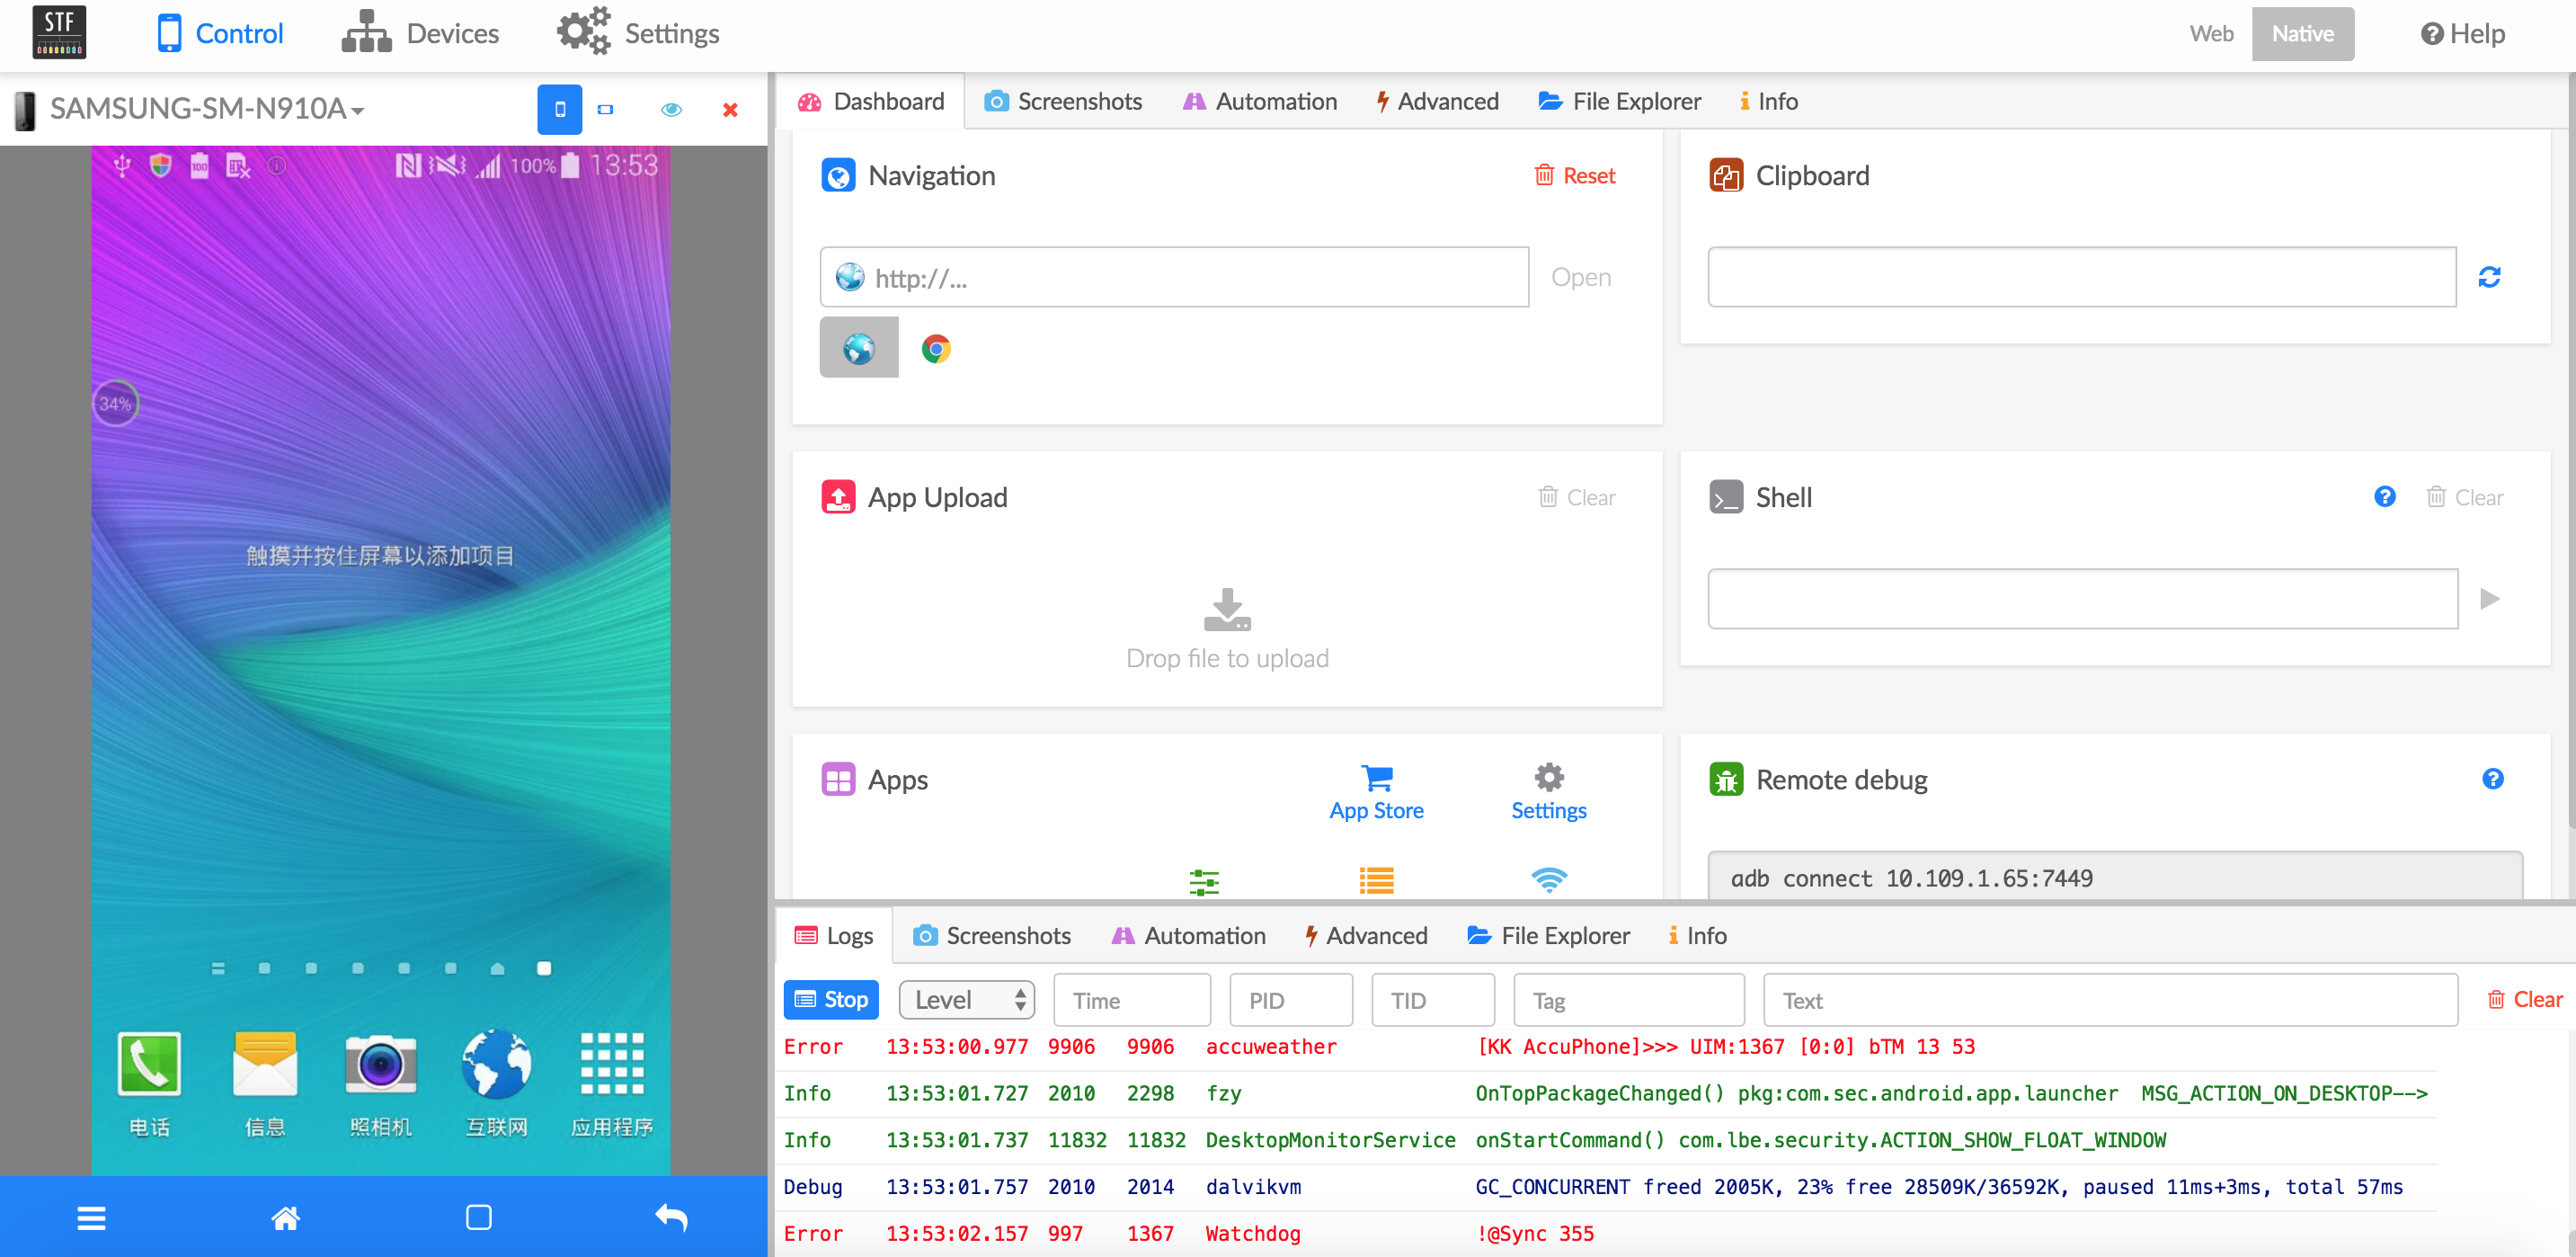
下图是一个配置好打开的stf页面。
1) 本地环境搭建
如果是用的mac,那么不要用docker了,因为反正也识别不到设备。参考https://github.com/sorccu/docker-adb/issues/8
"""
Unfortunately Docker on Mac does not support USB, since the underlying xhyve doesn't support it. The old boot2docker may have worked by tweaking VM settings.
I think the easiest (perhaps only?) way to get it to work would be to use a Linux VM and run docker there instead.
"""
如果使用其他的比如ubuntu可以试试下面的。对于mac还会遇到stf的地址访问不了的情况,真是坑爹啊。。
为了环境搭建方便,用了docker,接下来会做成docker compose。
先是拉取docker images:
sudo docker pull openstf/stf:latest
sudo docker pull sorccu/adb:latest
sudo docker pull rethinkdb:latest
sudo docker pull openstf/ambassador:latest
然后启动对应的服务:
sudo docker run -d --name rethinkdb -v /Users/bojiang/Android/srv/rethinkdb:/data --net host rethinkdb rethinkdb --bind all --cache-size 8192 --http-port 8090

sudo docker run -d --name adbd --privileged -v /Users/bojiang/Android/dev/bus/usb:/dev/bus/usb --net host sorccu/adb:latest

sudo docker run -d --name stf --net host openstf/stf stf local --public-ip my_pc_ip --allow-remote
对于Mac,对于/srv/rethinkdb这样的路径docker会提示path does not exist,所以在本地创建相应的文件夹并指向它,否则启动不了。
在Mac上可以直接配置环境,或者可以用虚拟机装一个ubuntu来尝试docker。
#install locally on mac
#if run locally without docker, please start rethinkdb first (would be better to create a folder then launch rethinkdb)

brew update && brew install rethinkdb graphicsmagick zeromq protobuf yasm pkg-config
npm install -g stf
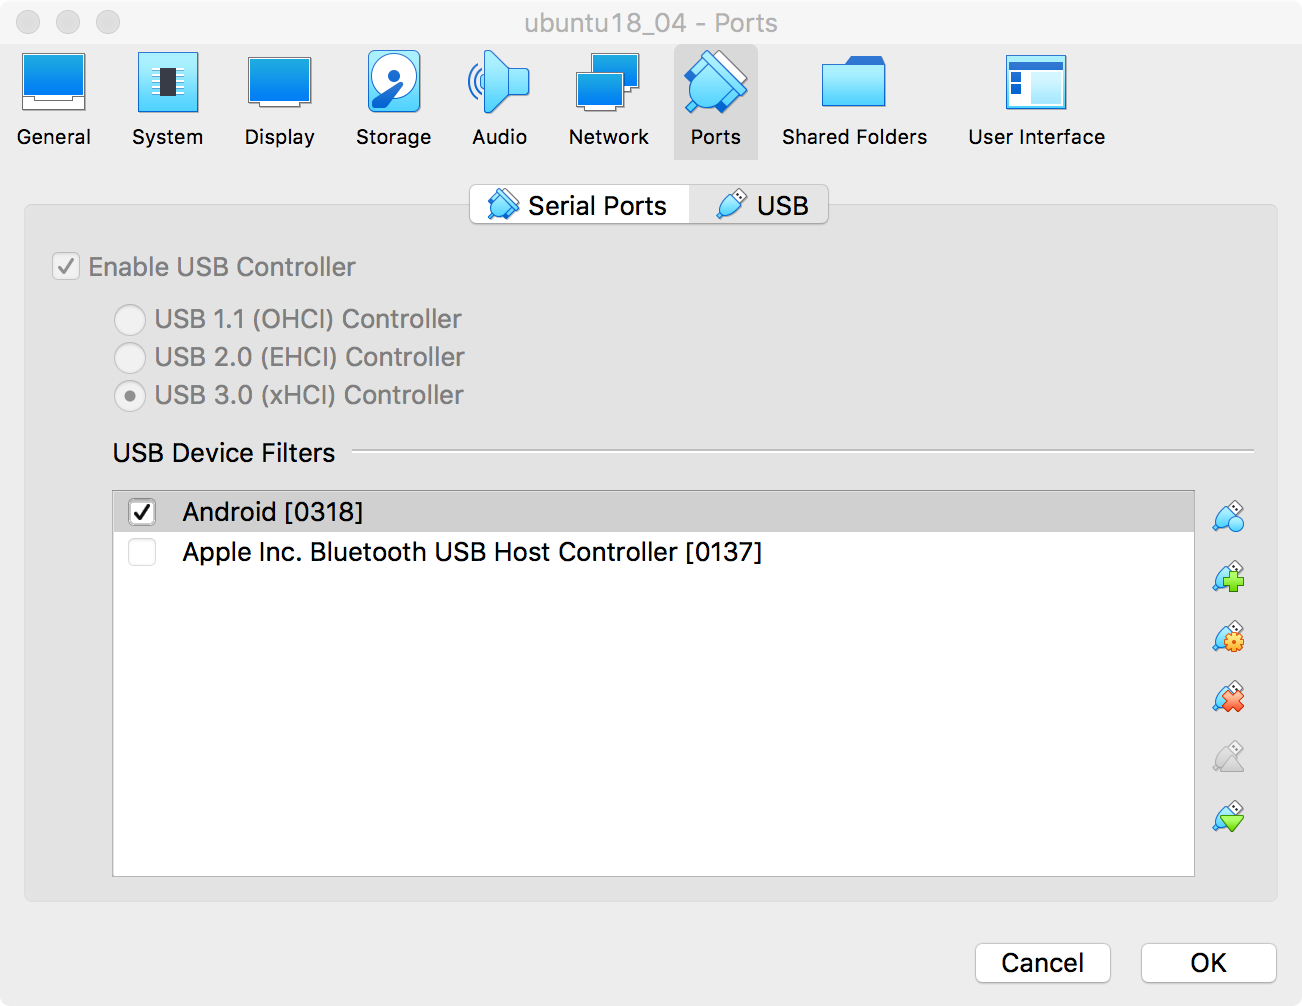
我用virtualbox装了ubuntu18.04,但是在virtualbox时需要配置usb设置,用于虚拟机识别连接的设备,如下图。对于usb3.0可以在官网下载安装 VirtualBox_Extension_Pack。
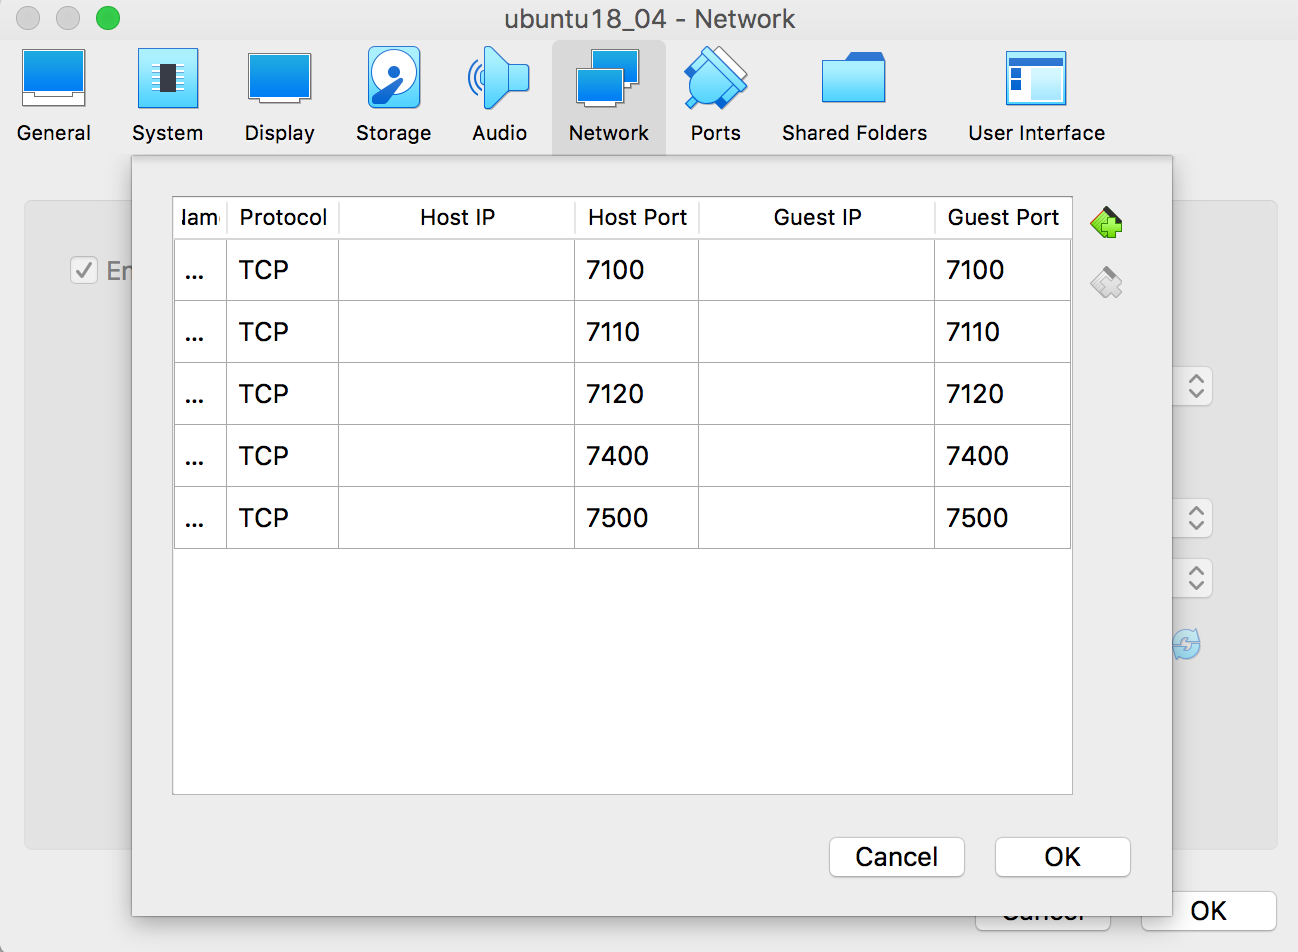
在虚拟机设置中,需要选择网络为NAT并且配置端口转发,如下图。
2) 连接远程机器
对于一台主机就算用了集线器也插不了多少设备,而且也会有使用场景类似有设备在远程主机上连接。
在这种情况,可以配置成master-slave这样的方式,由一台主机做master,其他主机上连接的设备也可以在master被访问使用到。
比如我现在有两个mac,一台ip是10.109.1.65(master,装好stf),一台ip是10.109.11.64(slave,无所谓装不装stf)。在slave上启动adb server,master则用stf provider连接到adb host和port。
#如果是32左右的老版本adb,用下面这个
adb -a -P 5037 fork-server server

#我用的是40,上面的命令不可用了,可以用下面这个
adb nodaemon server -a

#再到master上运行stf provider
stf provider --name Mac-Bo.local --min-port 7400 --max-port 7700 --connect-sub tcp://127.0.0.1:7114 --connect-push tcp://127.0.0.1:7116 --group-timeout 20000 --public-ip http://10.109.1.65 --storage-url http://10.109.1.65:7100/ --adb-host 10.109.11.64 --adb-port 5037 --vnc-initial-size 600x800 --allow-remote --screen-ws-url-pattern "ws://10.109.1.65:<%= publicPort %>/"
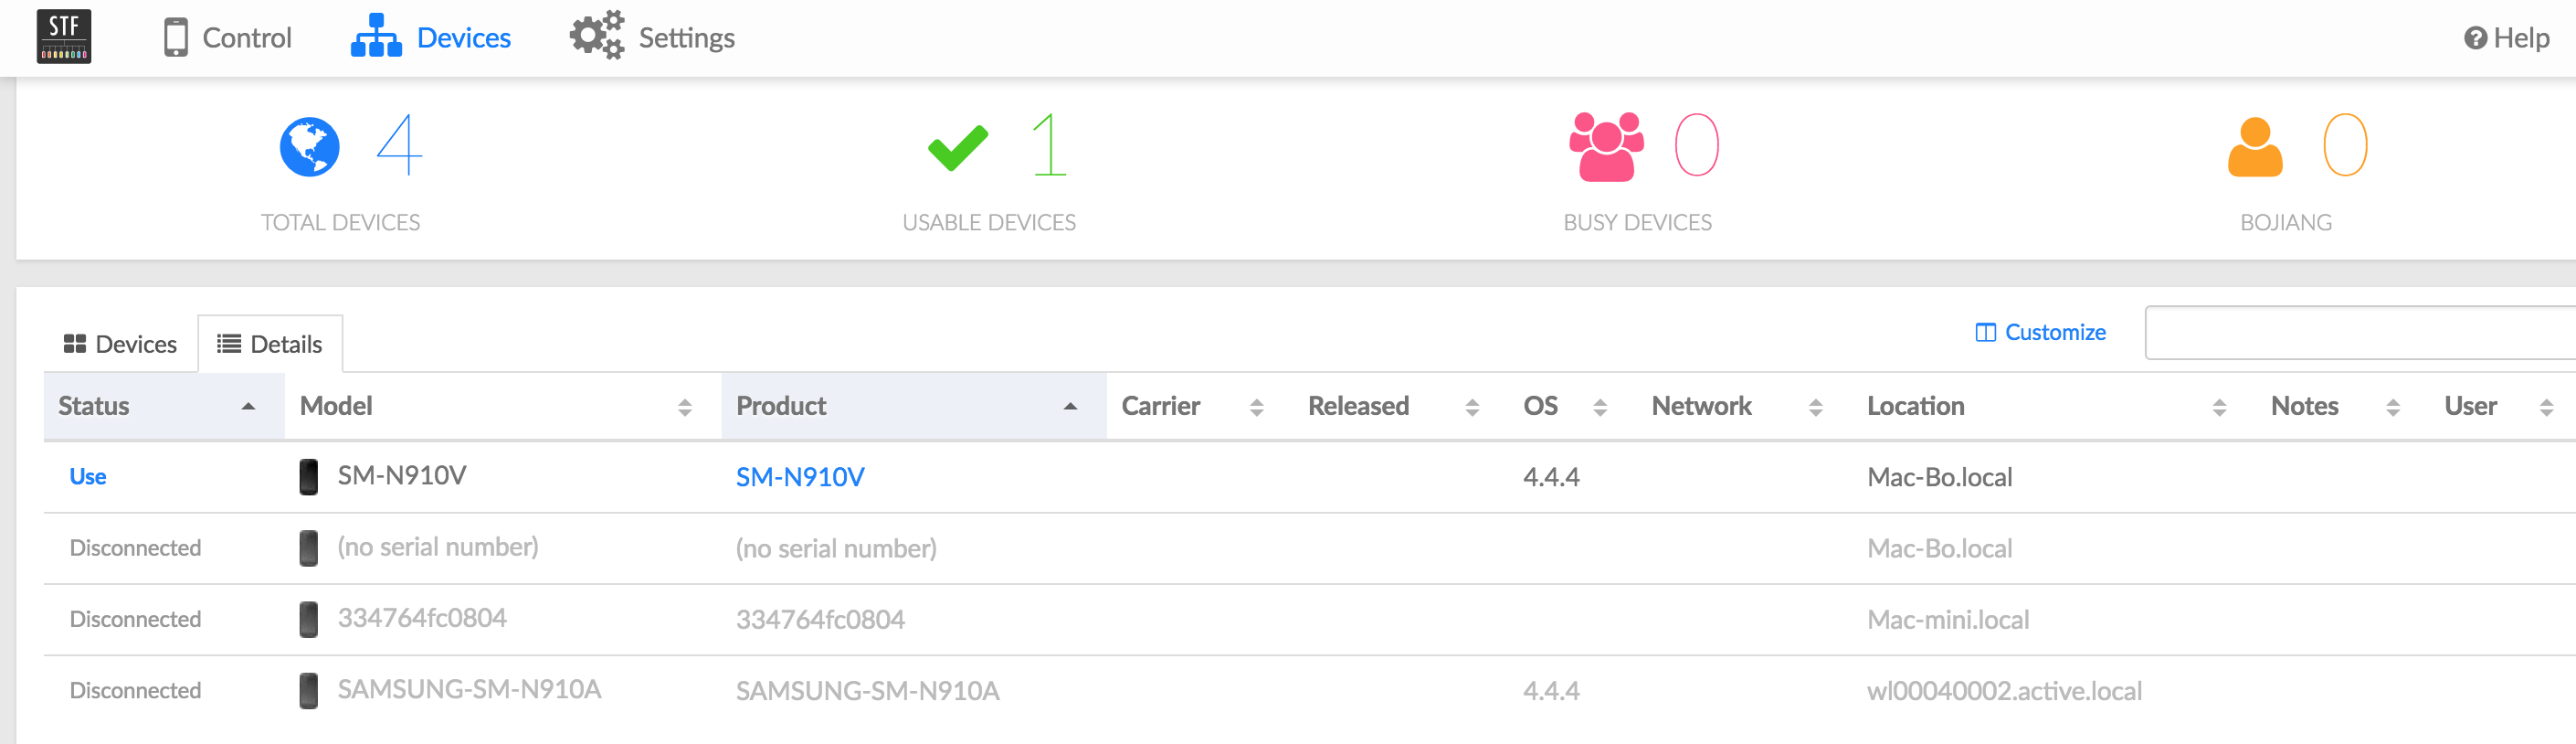
此时就能看到多台主机上连接的设备,并可以操作。
3)nginx配置
使用nginx来代理,避免了输入端口号,nginx.conf里加入下面内容试过可行,直接访问ip或者域名就可以打开stf页面。
# part of nginx.conf
server {
    listen       80;
    server_name  10.109.1.65;
    location /static/app/ {
        root   /opt/nodejs/lib/node_modules/stf/res/app/;
        proxy_pass      http://127.0.0.1:7100;
        access_log      on;
        expires 30d;
    }
    location /static/app/data/ {
        root   /opt/nodejs/lib/node_modules/stf/res/data/;
        proxy_pass      http://127.0.0.1:7100;
        access_log      on;
        expires 30d;
    }
    location /static/app/status/ {
        root   /opt/nodejs/lib/node_modules/stf/res/common/status/;
        proxy_pass      http://127.0.0.1:7100;
        access_log      on;
        expires 30d;
    }

    location /static/app/build/entry/ {
        root   /opt/nodejs/lib/node_modules/stf/res/build/entry/;
        proxy_pass      http://127.0.0.1:7100;
        access_log      on;
        expires 30d;
    }
    location /static/app/build/ {
        root   /opt/nodejs/lib/node_modules/stf/res/build/;
        proxy_pass      http://127.0.0.1:7100;
        access_log      on;
        expires 30d;
    }
    location /static/app/browsers/ {
        root   /opt/nodejs/lib/node_modules/stf/node_modules/stf-browser-db/dist/;
        proxy_pass      http://127.0.0.1:7100;
        access_log      on;
        expires 30d;
    }

    location /static/app/appstores/ {
        root   /opt/nodejs/lib/node_modules/stf/node_modules/stf-appstore-db/dist/;
        proxy_pass      http://127.0.0.1:7100;
        access_log      on;
        expires 30d;
    }

    location /static/app/devices/ {
        root   /opt/nodejs/lib/node_modules/stf/node_modules/stf-device-db/dist/;
        proxy_pass      http://127.0.0.1:7100;
        access_log      on;
        expires 30d;
    }
    location /static/app/custom/ {
        root   /opt/nodejs/lib/node_modules/stf/static/;
        proxy_pass      http://127.0.0.1:7100;
        access_log      on;
        expires 30d;
    }

    location /static/logo/ {
        root   /opt/nodejs/lib/node_modules/stf/res/common/logo/;
        proxy_pass      http://127.0.0.1:7100;
        access_log      on;
        expires 30d;
    }

    location /res/common/logo/exports/favicon.ico {
        root   /opt/nodejs/lib/node_modules/stf/res/common/logo/exports/favicon.ico;
        proxy_pass      http://127.0.0.1:7100;
        access_log      on;
        expires 30d;
    }
    location /robots.txt {
        root           /var/www/link_check/link_check/static/;
        access_log      on;
        log_not_found   off;
    }
    location /favicon.ico {
        root            /var/www/link_check/link_check/static/;
        access_log      off;
        log_not_found   off;
    }
    location / {
        proxy_pass          http://127.0.0.1:7100/;
        proxy_redirect      off;
        proxy_set_header    x-Real-IP        $remote_addr;
        proxy_set_header    x-Forwarded-For  $proxy_add_x_forwarded_for;
    }
}
4)问题解决
4.1) 主机无法访问到虚拟机的stf页面,但虚拟机中可以打开stf页面。
在虚拟机中用docker启动stf时public-ip需要用主机的ip而不是虚拟机的ip,这样虚拟机和主机才都能访问到stf网页。
4.2) 打开stf页面并且已经连接了手机,却总是显示disconnect。
手机需要安装stfservice.apk。https://github.com/openstf/STFService.apk
4.3) 当用npm install -g stf出现nnode-gyp rebuild相关的错误。
使用该命令sudo npm install --unsafe-perm --verbose -g stf。https://github.com/openstf/stf/issues/61; https://github.com/openstf/stf/issues/995.
4.4) 使用stf provider连接了其他主机的设备,可以使用,但是屏幕确实灰色一片,能操作就是看不到。
在stf provider启动命令中加入--screen-ws-url-pattern的参数。目前在网上的资料都没咋看到用这个,不知道其他人怎么看到远程机的屏幕的。我是加上后就正常了。如上面的命令所示。
4.5) 如果npm install -g stf时出现pyenv的错误提示:'python2: command not found',那就执行这句命令后再次安装: pyenv shell 3.6.5 2.7.14. (https://github.com/pyenv/pyenv/issues/1159)
文章评论 (5)
如果有多台slave,就得都安装stf了,每个slave启一个provider
这只猫挡住视线了,建议加一个关闭按钮
@guoqiang, 我现在暂时没有多余的设备验证你提到的问题,如果你目前比较急的话,可以用usb分线器让足够多的手机连接到你的机器上
如果我要再加一台机器,就是1台Master上装stf,还有两台Slave未安装stf,这里--adb-host参数该如何添加?谢谢
使用--adb host这种只能再加一台机器吧;